
I made this cake the other day for my dear friend Crystal as I have promise her to bake some cakes for her. I have asked her what cake she would like, and she just gave me the answer, any cakes I made, she sure like.
I thought of giving this Pandan Layer Cake a miss to post this again in my blog, but Little Thumbs Up September month event is Pandan which is hosted by Joceline of Butter, Flour & Me, so I just made my submission to participate the event.

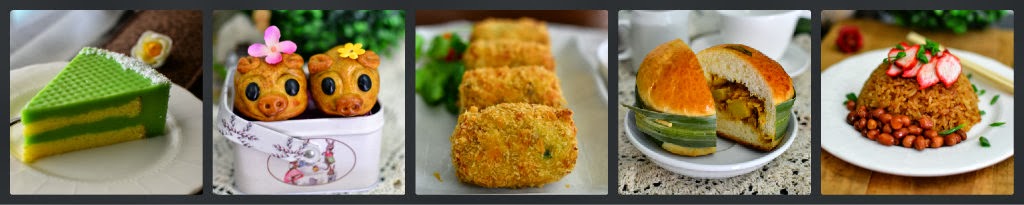
Pandan Layer Cake
Adapted from Agnes Chang - I Can Bake cookbook with slight changes
Ingredients for the cake:
250 gm. Optima flour or sponge cake mix flour
4 eggs
3 Tbsp. Pandan juice
a little green pandan paste or green colouring (I omit this)
3 Tbsp. Thick coconut milk (I omit this and replace with water)
1 1/2 Tbsp. cornoil
Ingredients for Pandan Kaya:
600 ml. Coconut milk
400ml pandan juice
9 Tbsp. Hoen kwee flour / green pea flour
1 Tbsp. Instant Jelly Powder
1/2 tsp. salt
140gm sugar
a little green colouring (I omit this)
a little pandan paste (I omit this)
a little green colouring (I omit this)
a little pandan paste (I omit this)
50 gm. Dessicated coconut for covering cake
Method for the Sponge Cake:
1. Beat sponge mix flour and eggs till light.
2. Add pandan juice and continue to beat till fluffy. Add in green colouring if necessary.
Mix in water (or coconut milk) and corn oil till well combined.
1. Beat sponge mix flour and eggs till light.
2. Add pandan juice and continue to beat till fluffy. Add in green colouring if necessary.
Mix in water (or coconut milk) and corn oil till well combined.
3. Pour into a lined and
greased 9” round baking tin and bake in a preheated oven at 170C
for about 35-40 minutes, till cooked.
for about 35-40 minutes, till cooked.
4. Remove the cake from
the oven and leave to cool. Slice cake
horizontally into 2 or 3
slices.
Method for the Pandan Kaya:
slices.
Method for the Pandan Kaya:
1. Put all the
ingredients into a pot and mix well.
2. Using medium heat, stir with wooden spatula and cook till mixture has slightly
thickened. Remove.
2. Using medium heat, stir with wooden spatula and cook till mixture has slightly
thickened. Remove.
3. Keep mixture hot by
putting the pot in a pan of hot water to prevent it from setting
too quickly. (I didn't do this way but I quickly divided the kaya into 2 equalportions and quickly assembly the cake).
To Assemble :
Place a 9” cake ring on a cake board, put 1 slice of cake into the cake ring, making sure there is space all around for the pandan kaya.
Put one portion of the kaya to cover the cake and sides. Repeat the same way till the last layer is covered with pandan kaya.
Leave aside to cool and set before chilling in the fridge for at least 4 hours, best over-night before removing the cake ring.
Next day, decorate the sides and top of the cake with dessicated coconuts before serving.

Once the mixture thickened, off the heat. Assemble the cake in reverse technique. And lastly, decorate the cake with dessicated coconuts to your liking.....

The sponge cake can be divided into3 layers but I still prefer to just have 2 layers so the pandan kaya can be equally about the same height of the sponge cakes. I have tried in 3 layers, but the pandan kaya after spreading seem to be thinner.
The first time I baked this Pandan Layer Cake was in 3 layers (view here).


I am submitting this post to Little Thumbs Up September - Pandan hosted by Joceline @ Butter, Flour & Me, organized by Zoe@ Bake For Happy Kids and Mui Mui @ My Little Favourites DIY.
Wow, this cake looks absolutely perfect. And I love the color. I'll save this and make it around St. Patrick'd day :)
ReplyDelete百吃不厌的经典蛋糕
ReplyDeleteyou are well done! i like this pandan layer cake very much. Thanks your sharing & link. Thanks for support LTU pandan sept. :) Thanks ~
ReplyDeleteWhat a gorgeous cake! I love the colour and the beautiful and even layering.
ReplyDeleteI love just how perfect the gorgeous cake stand is to show off your pretty green cake! ^^
ReplyDeleteWhat a superb layer cake! Beautiful colour too. I can imagine how it would taste, Mel. Well done!
ReplyDeleteIt has been sometime since i last had this cake, looking at yours is stirring up some craving! Beautifully done :)
ReplyDeleteThis is so amazing and beautiful. Delicious!
ReplyDeletewhat a pretty cake! I've never had pandan. i'd like to try it.
ReplyDeleteYour first attempt making this layer cake? Looks very beautiful, well done!
ReplyDeleteWow!!! Very well done, Mel! I want to try this too, thanks for sharing :)
ReplyDeleteHi Mel,
ReplyDeleteWe love eating this cake whenever we travel back to Singapore... Seeing your beautiful cake remind me that we can also bake this cake ourselves too.... or can I bake this as good as you??? :p
Zoe
Very pretty looking pandan layer cake. Love the pattern on the pandan layer!
ReplyDeleteThat's a gorgeous cake Mel, I have been wanting to try baking this cake but somehow keep procrastinating until it's too late! Even bought the huen kuih powder but never got round to doing it!
ReplyDeleteWhoa!!! This is such an amazing looking pandan cake, Mel!!! Look at the gorgeous layers!! This is a true beauty. Pinned! <3
ReplyDeleteMel,
ReplyDeleteThanks for sharing this to LTU.
Your first attempt always seems to be a great master piece. You have done a great job.
Now, can I have a piece for tea? :p
mui